
by Izolda | Mar 6, 2017 | Gardening, Tips
Plants form an essential part of the water and pond ecosystem in the garden, both aesthetically and practically. Discussing pond margin plants and bog plants, this article explores all you need to know to create the perfect setting.
Some bog plants cannot withstand totally waterlogged soil and need a certain amount of oxygen around the roots while others can be planted up in pots or containers and plunged into ponds, provided that they are stabilised at the recommended depth. This can be achieved by standing them on a platform of bricks or concrete blocks.
Both of these groups perform the all-important function of softening or breaking the line of the edge of the pond and integrating the water surface with the garden beyond. Their tranquil, serene reflections in the pond, especially when in bloom, enhance the reflective properties of the water.
Acorus gramineus (Japanese rush)
A grass-like member of the Arum lily family with variegated or golden leaves varying in height from 10cm to 40cm, depending on the variety. They are excellent pond margin plants, grown primarily for their attractive foliage; flowers are produced amongst the foliage and are seldom seen. Evergreen and cold tolerant, Acorus grows easily virtually throughout the country, and is suitable for plunge-pot culture.
Astilbe x hybrids
A clump forming perennials. Their fine, almost fern-like foliage goes completely dormant in winter, with new leaves emerging in spring followed by flower spikes bearing plumes of tiny flowers in shades of red, pink, mauve or white. Astilbe prefers rich, damp soils and semi-shaded growing conditions and does best in cool, temperate climates with high rainfall.
Chondropetalum tectorum (Thatching reed)
A popular member of the restio family originating from the Cape Province. It is a handsome plant that thrives in shallow water and grows in large clumps of up to 1,5 metres. Its slender, dark green, tubular stems are tipped with tufts of brown flowers in autumn. Suitable for plunge-pot culture, it is cold hardy, enduring and easy to grow in most parts of South Africa.

Cyperus prolifer (Dwarf papyrus)
A swamp plant found growing naturally in the coastal regions of Southern Africa. Upright stems up to a metre tall emerge from rhizomes and are topped with a tuft of fine modified leaves called sheaths. It forms large clumps and grows in water or damp soil. It is frost sensitive and is also suitable for plunge-pot culture.
Gunnera manicata
A truly magnificent plant, originating from South America. It’s huge rhubarb-like leaves that grow up to 2m long, baring long, stout, prickly stems that emerge from a central crown in spring. When fully mature, Gunnera forms an awesome sight during the summer months. The clumps become extremely large, so when planting one, ensure that there is sufficient space in which it can grow and develop. Only growing in cooler regions, it does best in semi-shaded, woodland conditions on the edge of ponds or streams, in soil that remains constantly moist and damp.
Hosta x hybrids (Plantain lily)
Clump forming, deciduous perennials that are grown for their bold, colourful foliage. New leaves emerge in early spring and colours vary from green to blue-grey with numerous variegated forms, such as green with white, cream or gold. Hostas prefer the rich damp soil of bog conditions, but definitely not waterlogged soils, and do best in the cool, shaded parts of a garden in temperate climates. Tall flower spikes of white or lilac flowers emerge above the leaves in summer.
Iris Louisiana hybrids
Garden hybrids of an iris that originates from the swamps of Louisiana. They adapt well to both water and dry land conditions, needing soil rich in humus and full sun or dappled shade, and form clumps up to a meter tall. Many die down in winter but emerge early in spring to put on a spectacular display in a wide array of colours. They are suitable for plunge-pot culture.

Iris pseudacorus (Yellow flag)
A large, strong-growing iris that forms clumps of upright, sword-shaped leaves up to a meter tall. In late spring and summer flower stems produce between 4 and 12 yellow blooms. It is a durable plant that should be planted in full sun and needs a large space in which to spread unless it is contained in a submerged pot. It is spectacular and easy to grow in most climatic zones.
Lobelia cardinalis (Cardinal flower)
A clump-forming perennial with reddish-purple stems and leaves. In late spring and summer, tall flower stems are produced bearing tubular, scarlet flowers. It must be cut back hard after flowering. It performs well in rich, moist soils close to, but not in, the water and thrives in full sun or light shade, preferring the cooler climates.
Zantedeschia aethiopica (Arum lily)
The common white arum seen in both the wilds and gardens of South Africa remains one of the most impressive pond margin plants. The spectacular white spathes contrast so strikingly with the large, lush green leaves and it prefers damp soil or shallow water, in sun or light shade. In short, it is a plant suitable for plunge-pot culture that is both rewarding and easy to grow.

by Izolda | Mar 6, 2017 | Gardening, Grow Your Own, Herbs & Vegetables, Tips
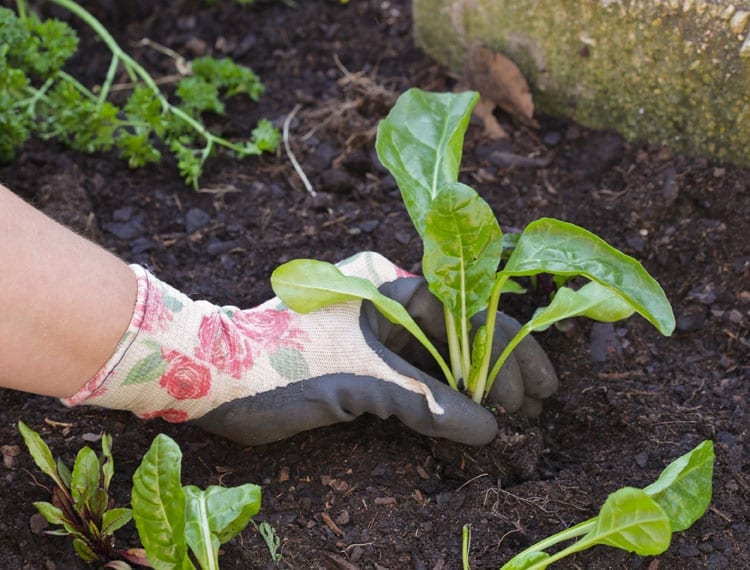
Gardening, and especially food gardening, is a craft. It is hand’s-on, literally, which means you’ll make mistakes along the way, but that is how you gain experience. A lack of proper planning is responsible for many of the setbacks encountered, especially if you want a continuous supply of vegetables. The golden rule is to spend time in the garden every day, even if it is only one or two minutes. That is enough time to see what is needed, and thereafter take action.
Over-watering
Water only when the soil is dry. This encourages vegetables to develop a deeper root system. Water each type of vegetable based on its individual needs, using a hose and nozzle or watering can. Overhead sprinklers or automatic irrigation deliver the same amount of water to everything, which can be too much for some and not enough for others.
Over or Under Fertilising
Over-fertilising produces soft, sappy growth and flavourless fruit. If the soil is enriched with good quality compost before planting, most vegetables will not need fertiliser during the growing season. This, however, does not apply to long-season crops like tomatoes, chillies, brinjals and squashes. They need supplementary fertiliser, or a dressing of compost, especially in poor or medium soil.
Not Understanding the Soil’s Importance
Even if the main focus is on producing edibles, building up the quality of the soil – by applying compost and green manures and practising crop rotation – produces a more sustainable vegetable garden that is still productive. Moderation is key here, which is why it is vital to incorporate horse or cattle manure occasionally to introduce different types of bacteria into the soil.
Not Thinning Out
This weakens the whole crop because of the extra competition for water, nutrients, space and light.
Over-Reacting to Pests and Disease
Pests and disease indicate a plant under stress. Before reaching for the sprays (organic or otherwise) try to find out the cause of the stress. Check watering, feeding and the amount of sun and make a note to avoid the problem next year before seeking a short-term remedy.
Not Harvesting in Time
Many vegetables lose quality, taste and texture the longer they are left on the bush or in the ground. Some crops, like tomatoes and chillies, can either be picked green or turning. This encourages the plant to produce more flowers and more fruit.
Know When to Bail
If a vegetable doesn’t grow in your garden, don’t keep on at it. Try something else. There is no lack of variety.

by Izolda | Mar 6, 2017 | Gardening
Autumn is the most important seed-sowing season in a gardener’s calendar. If you need evidence of this just take a look at how many of the plant species have seeds that ripen and disperse during the autumn, effectively sowing them so that the next generation can germinate. Many winter- and spring- flowering plants, most herbs and many vegetables germinate best when sown in autumn. Growing your own plants from seed is simple, easy and really economical.
Seed sowing tips for trays or containers
- Make sure that there are drainage holes in the bottom of the container
- Fill the tray two thirds full with coco palm peat.
- Level the medium and firm it down with a wooden stamp or similar flat object.
- Scatter the seeds evenly over the surface, ensuring that they are not too close together. (Very fine seeds can be mixed with a little white maize meal to facilitate even distribution.)
- Spread vermiculite gently over the seeds, so that they are just covered.
- Use the wooden stamp once again to press down lightly on the vermiculite.
- Water thoroughly with as fine a spray as you can obtain.
- Cover the tray with a sheet of plastic and place it in a shaded spot until germination commences.


by Izolda | Mar 6, 2017 | Gardening, Herbs & Vegetables, Tips
Now is the time to start harvesting and preserving herbs so that you have a good supply during winter. While fresh is always best, the strategy behind preserving herbs is to have them available during those lean months when annuals like basil, coriander, dill and rocket die down, and hardy herbs like oregano, marjoram, sage, parsley and thyme go dormant in colder areas.
By March many herbs are getting ready to flower, which means that they are at their tastiest. Unless you want to harvest the seed, herbs should not be allowed to flower as it leaves the leaves with a bitter taste.
Timing
Have you tried harvesting according to the moon? Herbs for drying should be picked during a waning moon. During a waning moon the sap moves down, which means that the stems and leaves dry more easily with less chance of fungus. Pick the leaves and flowers for drying during the morning, between 10:00 and 12:00 noon (by then the dew on the leaves has evaporated). Discard any leaves that are diseased or damaged.
If you are picking for immediate use it is better to harvest during a waxing moon. This is because the sap is rising and the leaves (and fruit and flowers) will be juicier.
Preserving Options
Most perennial aromatic herbs retain their flavour when dried. This is the easiest, cheapest and most effective method of preserving them.
Parsley and annuals such as basil, coriander and rocket lose their taste when dried, so it is better to preserve them by making a pesto that can be frozen, or by chopping the leaves and freezing them in ice trays with a little water.

Infused herbal oils and vinegars are another delicious way of preserving herbs. The oil can be used in salad dressings or to flavour cooking.
Herbal vinegar can be made with a single herb or a mixture for a more complex flavour. Use the vinegar in dishes, marinades and salad dressings, and when grilling meat.
How to dry herbs
Drying herbs can be as simple as putting them on brown paper in a cool room. Alternatively, tie the herbs in a bunch, hang them up and put a brown paper bag over them before tying that up as well. The paper bag keeps dust and insects off the herbs and collects any loose pieces as they dry. Remember to label and date the airtight containers that you put them into once dry.
Herb mixes
An even quicker way to preserve the freshness of herbs is to chop the leaves finely and add just enough olive oil to cover them, and then store the mixture in a sterilised, airtight container in the refrigerator. This mixture doesn’t last as long as the frozen pesto, so use it up quickly. Just add a dollop to the dish as you are cooking. Using this method you can combine herbs to make an Italian mix (basil, marjoram and parsley), chicken mix (sage, lemon thyme or rosemary, plus parsley, chives and garlic), pizza mix (oregano, chives and parsley) or a stir fry mix (coriander, lemon thyme, parsley and chives).

by Izolda | Dec 14, 2016 | Events
While working in Jo’burg last month, I decided to venture forth and find out for myself what an authentic shisanyama experience was all about.
My first obstacle – I didn’t know where to go! I could have Googled it but I chose a different approach. At the time I was standing outside Gallagher Estate, with streams of visitors walking past me as they left Decorex, so I decided to do a little market research. I stopped a random selection of passersby and asked them where I could get the best shisanyama. Interestingly enough, every one of the 20 or so people I asked gave me the same answer: “Imbizo Shisanyama! Busy corner!” With that it was a done deal, so I set my GPS and headed off, driving deeper and deeper into Midrand.
I have to admit I was feeling a little anxious but my nerves disappeared when I was warmly greeted by Ann Booyen, hostess and assistant to the managing director, Rita Zwane. I was immediately offered a seat and a glossy, slick menu. “Cocktail?” asked Ann. “Don’t mind if I do!”, I replied. I headed off to the cocktail bar and made my (virgin) selection, and, wow, it was good![ux_image id=”4052″]
[gap height=”20px”]
I was visiting on a weekday and Ann commented that I was lucky I was as the venue ‘pumps’ on weekends! Nevertheless, being on my own, I wanted to get the feel of this much-talked-about place. So what does one do in such a spot? You make friends! I ordered my meal, The Ultimate African BraaiFeast, and sidled up to the gentlemen sitting nearby and asked if I could join them and share my lunch. And folks, that’s when the real shisanyama experience kicked in!
Lesley and his friends chatted openly to me, first asking me why I was alone and whether I felt safe. I laughed and asked why I wouldn’t feel safe when in the company of such big strong men! The waiter then walked through with my selection of fresh meat and handed it over to the braai masters. I was told that all six of the fires get started up at five in the morning, with grids big enough to hold kilograms and kilograms of meat at a time. Who could resist that sight? I jumped out my seat and made my way to the stations and watched with amazement how quickly and with what precision the meat was turned, basted, and suddenly ready to serve!
Now to the eating part, because this is when I got to have the most fun. Lesley passed me a plate and took charge, telling me what to serve and how to eat it. I was offered a knife and fork but decided instead to follow Lesley’s lead. On the large central dish was a selection of chicken, lamb chops, boerewors, kebabs and short rib. What a mouth-wateringly delicious sight! The way to do it is to take a generous serving of pap and slop that on your plate together with the yummiest spinach I have yet to taste (it took me back to my childhood years, when my nanny used to make me my favourite spinach). Add to this a generous portion of chakalaka and some meat (I started with short rib), and then tuck in – fingers and all! Short rib is an interesting cut of meat that many people don’t buy anymore, but I love it when I braai at home for two reasons – the chief braaier (me) gets to sample it straight off the hot coals, and my friends love it![ux_image id=”4053″]
[gap height=”20px”]
What I loved most about my experience at Imbizo Shisanyama was that the meat was piping hot, the succulent bits of fat on the chops and short rib were crispy and delicious – exactly the way it’s meant to be, from the fire to the mouth…
But I nearly forgot to tell you about the best part. My new-found friends drew my attention to the steamed African bread. Guys, this was the real winner! Lesley showed me the proper way to eat it – spread lashings of chakalaka on the bread, tear off a piece of meat, hold the two together, and aim for your mouth! Heaven in a munchful!
This, my friends, is the real deal: eating, sharing, crossing barriers, breaking the mould, learning, and all over a meal that is called ‘burnt meat’ when translated into English. I am totally converted, and in fact our next get-together for the Braai magazine team is at our local shisanyama!
Go on, try it, you’ll love it!
[ux_image id=”4054″]
[gap height=”20px”]
About Imbizo Shisanyama
- It’s known by patrons as ‘Busy Corner’.
- It started on a dusty corner in 1997 with only a 2-litre pot, a gas griller, display fridge, paraffin stove and two employees.
- The original ‘pap’ pot is now displayed proudly in the restaurant.
- Started and still run by Rita Zwane.
- Imbizo Shisanyama now supports over 100 families. Other small businesses have been born out of this business – a car wash, security services, locally sourced chakalaka, salads, and steamed bread.
- The Imbizo Shisanyama bursary fund was launched in 2012.
Click here to read more!

by Izolda | Dec 6, 2016 | Herbs & Vegetables, Recipes
I love cooking and experimenting with different cuts of meat. Beef short rib is one of my favourites – it’s usually regarded as a cut to cook slowly in a potjie or for hours in the oven but it can be equally delicious cooked quickly over a high heat. Try it – you won’t be disappointed!
Meat
Ingredients
1kg of beef short rib (we asked the butcher to cut it into smaller pieces)
Salt and pepper
Instructions
Season the ribs with salt and pepper and braai them over a hot fire for 3-4 minutes, then move them to the edge of the braai to cook on a lower heat for 15 minutes. Brush the ribs on both sides with sticky sauce and cook for a few minutes before serving. Serve with extra sticky sauce.
Sticky sauce
Ingredients
11∕3 cups of dark brown sugar
6 cloves of garlic, crushed
2 tablespoons of Worcestershire sauce
¼ cup of HP sauce
½ cup of whisky (this is optional, use water if you like)
½ cup of wine vinegar
A handful of fresh thyme leaves
3 star anise pods
Salt and pepper
Instructions
Add all the ingredients to a saucepan and heat.
Cook for 5 minutes and set aside to cool.
Enjoy!

by Izolda | Nov 4, 2016 | Gardening, Water Wise
It’s tough out there folks. We have to save, save and save all the water we can! Harsh restrictions have been put in place by certain municipalities in South Africa. For me, this is an ideal opportunity to change our gardening ‘bad habits’ and, most importantly, to toughen up our plants!
Here are my top water wise gardening tips for surviving the water restrictions:
#1
If you have to choose what to keep alive, then let the lawn go but please don’t dig it up. It’s far better to have dead grass covering and protecting the soil than nothing at all. Grass is the least of your worries when it comes to your garden. When the restrictions are lifted, it’s a simple day project to replace a dead lawn with instant lawn sods.[ux_image id=”3747″]
[gap height=”20px”]
#2
Invest in the Gardena drill pump. It’s amazing and will take away all the hassle of distributing grey water to your garden beds. Remember – grey water (from your bath, for example) is a water wise must and your garden will love it.[ux_image id=”3843″]
[gap height=”20px”]
#3
Take a 2-litre plastic bottle and turn it into a slow-release drip irrigation system for trees and large shrubs:
- Using a cordless drill with a maximum of a 5mm drill bit, drill about twenty holes around the perimeter of the plastic bottle.
- Bury the bottle alongside the plant with its neck sticking out of the soil.
- Simply open the plastic lid and fill the bottle with water. The water is then released slowly and gently as the plant needs it. Simple and easy!
[ux_image id=”3748″]
[gap height=”20px”]
[ux_image id=”3749″]

by Izolda | Aug 24, 2016 | Gardening, Tips
Get your lawn off to a great start this Spring – start with treating it right!
What you need to do:
1. Scarify the lawn.
Cut the lawn as low as possible with a lawnmower – this is called scarifying. There are scarifying machines available for hire but a lawnmower on the lowest cutting setting will do the job. Cut the lawn almost to the roots (except in subtropical areas and for grasses like Kukuyu as this may kill the lawn). If you don’t use a grass box on your lawnmower, the bits of grass left on the lawn will eventually compact and become thatch. Scarifying will help get rid of thatch build up.
2. Use a garden fork to poke holes into the lawn.
This aerates the soil, allowing air to penetrate the area – a fundamental growing need for plants.[ux_image id=”3288″]
[gap height=”20px”]
3. Fertilize the area.
Use a 2:3:4 fertilizer to give it a good kick-start and encourage strong roots. Using a fertilizer distributor will feed the area evenly.
4. Top dress the lawn using commercially formulated lawn dressing.
Using other soil like topsoil from the side of the road may bring all the weeds from the area onto your lawn so don’t do that! Spread a light load onto the lawn and then, using a plastic rake, spread the lawn dressing over the area. The lawn dressing should be a thin layer – avoid covering the plants completely.
5. Water it!
Water in the fertilizer and lawn dressing well and sit back and watch your lawn thrive.[ux_image id=”3289″]

by Izolda | Aug 24, 2016 | Gardening, Tips
Spring is synonymous with clivias in full flower!
Their bright blooms burst forth in September and instantly banish the last lingering traces of the winter blues. Here are some steps on how to grow them from seed:
- For successful germination, use fresh seed. Pick the berries when they start colouring and remove the pulp and membranes around them. The seeds will be large with a pearly sheen.
- Wash the seeds with an anti-fungal solution or a weak solution of dishwashing liquid and water.
[ux_image id=”3280″]
[gap height=”20px”]
- Fill a seed tray with coarse, damp river sand (the soil should not be sopping wet). Push the seeds into the medium so that about 50% of their surface is above ground. Alternatively, you can use coconut husk or peat as the medium. You get these in handy blocks that you submerge in water – the product then absorbs water and makes a full 5l of awesome growing medium!
- Cover with a layer of vermiculite – this forms a warm ‘blanket’ for the seeds to be able to germinate in. Place the tray in a warm spot out of direct sunlight. Although further watering is not needed, check that the sand remains damp.
[ux_image id=”3281″]
[gap height=”20px”]
- Sprouting should be within 4 – 6 weeks.
- Fill small pots or a deep seed tray with milled bark or commercial potting soil. Water the soil medium well and make holes of about 2cm deep with a dowel stick. Gently plant the sprouts in them, leaving half of the seed body above ground.
- Place the seedlings in a warm, protected spot in the shade and water them with a gentle sprayer once or twice a week.
- The seedlings are slow-growing, and can remain in their containers for about two years before they will be strong enough to plant out.
[ux_image id=”3282″]