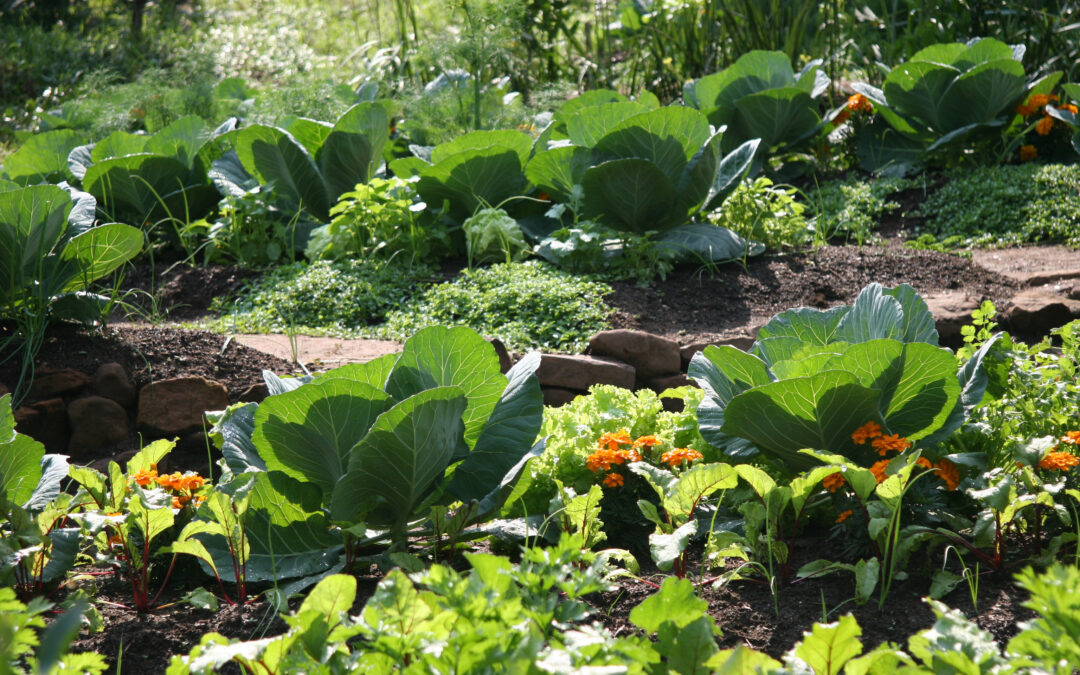
Thrifty gardeners like to use every part of the vegetable. Why throw away luscious beetroot tops, colourful Swiss chard stems or crunchy broccoli stalks? If you use what everyone else tosses away, then you are a ‘root-to-stem’ gardener. This is the latest trend in a world that’s conscious of waste and the rising cost of food.
Creative gardeners and cooks are taking this trend even further with recipes for carrot-top pesto, radish greens chimichurri and roasted cauliflower steaks.
It has also been discovered that the parts we throw away (hopefully on the compost heap) are just as rich in nutrients, if not richer, than the parts we eat, such as broccoli stems, beetroot leaves and more. There are plenty of summer veggies that can be eaten root-to-stem. Here are our suggestions:
Swiss chard: ‘Bright Lights’ varieties with colourful stems offer the most options. Chopped small, they can be added to soups and stews, sautéed with onions, peppers and other veggies in stir-fries, or steamed and added to pasta, quiche and other baked dishes. Those with the large white rib can be steamed and served with hollandaise sauce, as an asparagus substitute.
Growing tips: In summer, Swiss chard grows better in partial shade. Water regularly and feed monthly with a nitrogen-rich fertiliser to boost leaf production. Harvest 2 – 3 outer stems at a time from each plant.
Summer squashes like baby marrows and patty pans, as well as winter squashes (pumpkins and butternut), produce edible flowers, and the young leaves can be eaten like spinach, often referred to by people in rural areas as marog.
Cook the leaves as soon as possible after picking because they wilt quickly. Wash well and shred. Sauté an onion and some garlic and add the leaves. Add some water or stock and some chopped tomatoes and potatoes and stew until the vegetables are very tender. The ‘hairiness’ of the leaves diminishes with cooking.
Growing tips: Plant in full sun, in well-composted soil that drains well. Allow enough space for plants to grow (overcrowding may cause fungal disease). Water at the base of the plant and avoid wetting the leaves.
We all know our gardens slow down considerably in the colder months, but there is no need for our veggie patches to slow down. There are many vegetables that can tolerate cold and be classified as winter veggies, yes even minus degrees and light frost. With a few simple measures, you can have veggies all year around. And if you are a salad loving person, don’t fret, even your lettuce will survive with a little help. Protecting these with frost cover cloth or cloches, even plastic 2l bottles (cut the bottoms off and whalla! Or “Voila!” if you’re French), will ensure that your salad bowl is never empty. Just remember to remove the protection during the day so that these little guys can soak up the sun.
What about severe cold?
Should a severe cold spell be predicted, artichokes, beets, carrots, cauliflower and celery can be protected in the same way. If your cabbages have formed heads, no worries, they are now strong enough and the frost will not be a problem. Luckily for you, all other brassicas, garden peas, spinach, turnips and leeks can withstand heavy frost. Plant away!
How to lay frost cover (and how not to!)
When laying frost cover over your veggies, make sure that the cloth does not touch the vegetables. This creates a barrier between the cold and your greens. If the cloth does touch your veggies, you are sure to have frost burns on the plants. Save yourself a lot of disappointments and do it right the first time. Sticks and wire make an easy simple frame for you to drape your cloth over. You don’t need to be a rocket scientist to build a frame! Bloudraad (wire) is as strong as an ox. Bend it to form small wire hoops and lay across your veggie beds. Cover with frost cover cloth. Ideally you should remove the cover every morning after your first cup of coffee, to allow sunlight. If the weather is dreary for a couple of days, keep it on. No one likes being outside in winter without a jacket. Taller plants? Use sticks. Place you sticks around the plant and wrap it with frost cover. You can leave the top open only if the frost cover is higher than the plant. Should the top opening be big enough for the plant to receive sunshine, you can leave it standing throughout winter.
Don’t forget to watch the weather closely
Frost occurs when temperatures reach zero or fall below, this also depends on dew and wind factors. Very cold winds can cause black frost. Following the weather man can save you a lot of trouble in trying to predict the weather yourself. Tune in and keep watch. Should you live in an extremely cold area, there is still hope of watching your winter crop grow. Plastic tunnels can be made by digging down in your beds and using wire hoops and plastic. Dig a trench on either side of your bed and place the hoops. Fill back the soil after you have placed the plastic over the frame. Remember to keep a side open for easy access to your growing veg. This will act as a mini greenhouse. Your spinach, beetroot and cabbage will thrive in this little greenhouse.You can even sow your salad vegetables in trays and place them in your greenhouse, germination guaranteed! Microgreens are jam packed with goodness and need little space to be successful. Mix up your lettuce, baby spinach and even herbs like rocket and coriander seeds.
Talking about little space…pots, pots and more pots
Plant up with thyme, parsley, oregano, chives and more coriander. Keep them in a warm, draught-free area. Pick at hearts content for those lovely winter stews. Beds that don’t receive enough sun in winter should be left to rest. Keeping some beds empty, allows for early planting in spring, especially in winter rainfall areas where the soil stays too wet. Simply cover with mulch and wait for the goodness to happen.
Autumn is a good time to grow vegetables in containers. The milder days are less stressful for the veggies than the blistering heat of summer. Looking ahead to winter, containers can be shifted into sunny, sheltered areas, especially if the veggie garden is draughty or doesn’t get enough winter sunshine.
Position:
Autumn and winter veggies need 5 – 6 hours of sun a day and there should be good air circulation. Move the pots around to make the most of the sun.
Container size:
The bigger the better, because larger containers hold more soil (which doesn’t dry out as quickly). The shape of the container, round or square, doesn’t matter, provided the plant has enough space for its roots and top growth. Even if the seedling looks a bit silly in such a large pot, it quickly grows to fill the space. Planting too many plants in a small pot reduces yield, and increases pest and disease problems.
Broccoli, cabbage, kale – One plant per large plastic pot (35 – 43cm diameter). Baby cabbage can be grown in 20 – 35cm pots.
Spinach, lettuce – One plant per 20 – 35cm plastic pot or three plants in a 50cm pot or trough. Space 10cm apart.
Baby carrots, radishes, beetroot – Direct sow seed into troughs, window boxes or pots that are at least 20cm deep. Thin to 10cm apart.
Types of containers:
The lighter the type of pot the easier it is to move. The Urban Box has castors so that it can be wheeled into position. Terracotta pots are heavy and more porous, which means they need more watering. Dark pots can get very hot because they absorb the sun’s heat. Also steer clear of plant boxes made of treated wood (creosote) as the chemical can end up in the veggies.
Soil mix:
Use the best quality potting soil, not ordinary garden soil. However, commercial potting soil does not contain enough nutrients for vegetables. Mix in the following supplements:
Fertilis Earthworm Castings;
Vita Grow 2:3:2 fertilizer;
Vermiculite for good water retention;
Bonemeal or BioRock Root Builder;
Line the bottom of the container with hessian clot or weed-guard fabric to ensure good drainage before filling it.
Made for containers:
Broccoli: ‘Spring Rapini’ is a sprouting broccoli that produces edible leaves, stems and small heads that can be harvested sooner (50 – 60 days) than conventional broccoli.
Kale: ‘Vates Blue Curled’ is a compact low growing cut-and-come again variety. The first baby leaves can be harvested within 25 days.
Carrots: ‘Sweetheart’ is a tiny Nantes-type group carrot that is only 10cm long, and ‘Parisian’ is a small and sweet, round orange carrot.
Radishes: Radishes now come in a range of colours. ‘Watermelon’ has a white ‘rind’ and deep pink core (like a tiny watermelon).
Beetroot: Baby beet ‘Rainbow Mix’ can be grown as a sweet-flavoured baby beet or left to mature into larger veggies. The mix provides a lucky packet of colours: deep red, yellow, white, candy-striped and lighter purple-red. ‘Chioggia’ is an heirloom candy-striped beet.
Lettuce: Loose-leaf lettuce doesn’t need as much space to grow as crisp-heads, and individual leaves can be harvested for longer. Plants are not frost hardy but will survive under frost cloth or in a sheltered position.
Swiss chard: ‘Bright Lights’ have such colourful stems and are just so pretty. Their stems can be chopped into soups and stews.
Endive Chicory:‘Catalogna Bi-colour Blend’ is a salad leaf with an edge. The curly leaves and crispy white stems add crunch and a tinge of bitterness to winter salads. Pick young, before the plant blooms.
Container growing tips:
Water often and adjust to changing temperatures as days become cooler.
Spray pests with organic, non-toxic solutions like Biogrow Pyrol, Ludwig’s Insect Spray or Margaret Roberts Organic Insecticide for pest attacks like bollworm, vegetarian ladybird, scale or mealybug, as well as for aphids, white fly and red spider mite.
Starting about a month after planting, feed your vegetables about once a week with a water-soluble fertiliser, like Margaret Roberts Organic Supercharger, or a home-made manure/green tea. Alternatively feed with a slow-release fertiliser like Vita Fruit & Flower 3:1:5 every 3 to 4 months or as per crop requirements.
Don’t forget:
Don’t forget to add the vegetable container garden soil to your compost at the end of the season. Reusing soil from year to year can spread infections and insect infestations. Scrub the container and rinse with a solution of one-part bleach to 10 parts water, then rinse with clean water and store in a dry spot.
Our Team is ready to answer any questions or concerns that you may have. Feel free to get in touch!
Office Hours: 8:00am – 16:00pm
If we are not available then email us and we will get back to you as soon as possible. hello@tanyavisser.com