These three plants never disappoint in the perennial quest for effortless garden beauty.
We’ve all had those moments when we yearn for a low-maintenance garden that can still captivate with its vibrant colours and textures. But choosing the right plants can be a challenge. Fear not! We’ve got a fabulous foursome that will bring life and allure to gardens across different climates, from Muizenberg to Musina. From the dramatic Carex ‘Everillo’ to the enchanting Hebe ‘Sunset Boulevard’, and the compact yet mighty ‘HibisQs’ series, let’s explore these three plants that will work their magic while you sit back and relax.
Carex ‘Everillo’Hebe ‘Sunset Boulevard’‘HibisQs’
Carex
Our first favourite of the three chommies is actually a whole genus – Carex. There are many varieties to choose from, but let’s shake up those sunny or shady garden spots with the showstopper Carex ‘Everillo’ or the majestic Carex ‘Feather Falls’.
‘Everillo’ is a trendsetter with cascading foliage that starts lime-green and changes to golden-yellow. ‘Feather Falls’ has clean, variegated green and white foliage and gets beautiful feathery flower plumes in spring. Both have similar growing characteristics:
They are evergreen.
They can be planted in the garden or in containers. Low-maintenance plants that are tough and resistant to cold and frost.
Create a dramatic visual impact.
Reliable choices for any garden.
Require well-draining soil enriched with compost and bonemeal.
Should be pruned regularly and heavily to keep them neat.
Reach 50 x 50cm.
Hebe ‘Sunset Boulevard’
Hold on to your gardening hats for famous hebes and let Hebe ‘Sunset Boulevard’ steal the spotlight.
This trendy shrub reaches a height of 1m.
It has dark pink flowers that bloom abundantly in summer and autumn.
It has glossy dark leaves and sassy red mid-ribs, adding glamour to the garden.
It thrives in well-drained soil.
Protection from frost is necessary.
It can be enjoyed in pots, rock gardens or mass plantings.
‘HibisQs’
Looking for vibrant flowers to brighten your garden and create the perfect selfie backdrop? Look no further than the compact hybrid ‘HibisQs’, bred from the hibiscus but with longer lasting flowers.
These small but mighty plants reach a height of up to 2m and width of 1.5m.
They showcase lush foliage and have a never-ending blooming season.
Each vibrant bloom features a contrasting eye zone or throat, adding visual appeal.
Planting one can instantly transform your patio, balcony or garden into a tropical paradise.
Plant in well-draining soil.
Protection from cold and frost is necessary.
Regular watering and appropriate fertilisation are essential for best results.
The magic mathematics of a good-looking pot, starts with a thriller, a filler and a spiller. Potted magic This ratio of plants is the beginning of potted success. Our contrasting colour combination here will brighten up any spot in need of a makeover.
You will need:
A pot with drainage holes
Pebbles for drainage (you can even use smaller broken up pieces of an old clay pot).
Fresh potting soil
Compost
Slow- release fertiliser
Bonemeal
Decorative bark or wood mulch
ThrillerSpillerFiller
Plants to use:
A thriller – we chose Agapanthus ‘Bucanneer’ for this task for its ability to grow tall impressive stems of purple flowers that last up to 8 months of the year
A filler – with its stunning dark foliage, Loropetalum ‘Plum Gorgeous’ covers colour needs even when there are no flowers in the pot.
Two spillers – amazing yellow lime afro-like foliage, makes Carex‘Everillo’ an ideal spiller to contrast with the other two.
Steps
First prepare the soil with half potting soil and half compost and add in 2 handfuls of fertiliser. Add in some bonemeal to provide extra calcium for the plants. Give this a good mix.
Add your drainage pebbles to the bottom of the pot.
Fill the pot halfway with your soil mix.
Carefully remove the plants from their bags without disturbing the roots. Gently tease any compacted roots with the tips of your fingers to encourage the roots to grow laterally once planted.
In goes the agapanthus. It’s important to make sure that the top of the plant sits about 2cm below the pot rim so there is no water spillage when watering. Next the loropetalum and finally the carex.
Add some more soil under a plant, if you want to play with the height.
To finish off, fill the pot with the remaining soil mix, firming down with your trowel handle so that the plants are snug and secure.
Add a layer of decorative bark or wood mulch and give your newly potted garden a good drink of water. Continue to water at least twice a week to get the plants well settled.
Follow the Thanks Plants campaign on www.thanksplantssa.co.za and enter the competition in the August, September and October issues of The Gardener and Die Tuinier.
Spring and summer are the seasons to truly appreciate the flowers in your garden. Of course, they look beautiful and attract plenty of garden friends that help the environment too. But there is one character they provide that may be overlooked in favour of their beauty – scent.
So many flowers release intoxicating scents that upgrade the experience in your garden dramatically. These scents are the inspiration for the thousands of perfumes and sprays we cover our bodies and homes in, so what could be better than the real thing? Ensure you have at least one of these six plants in your garden for the ultimate sensory feature.
Roses
A classic flower that has spawned millions of devoted followers and several societies dedicated to their appreciation and preservation, the rose is a must-have in any scented garden. If they weren’t, the phrase ‘stop and smell the roses’ wouldn’t be a cliché. When planted en masse, roses fill the air with a sweet scent unlike any other flower. When planting one, you may have to get up close and personal to appreciate the fragrance, but it will certainly be just as special.
Lavender
Another classic floral scent, and a great companion for roses, is the humble lavender. Very few gardeners can resist this bushy plant covered in hundreds of small purple flowers that not only look fantastic, but smell great too. Walk past a lavender bush and you can’t help crush a few leaves between your fingers or pull the flowers up to your nose. Few need more convincing than that, but they do come with the added benefit of holding their scent when dried, making them ideal candidates for potpourri.
Gardenia
Take a look at the descriptions in any perfume store and you are bound to see gardenia more than a few times. This popular scent is captivating, and the flowers have a remarkable ability to permeate the air in your garden. Depending on which gardenias you choose, your garden could be filled with their fragrance from spring all the way into autumn. Alternatively, cut them off their stalks and bring them indoors to fill your home with their scent from a decorative cut flower vase.
Sweet Alyssum
A fragrant plant that doesn’t get as much attention as it deserves is sweet alyssum. It’s prized for its ability to fill containers, cascade over the sides of hanging baskets, or act as a ground cover, making it the perfect companion plant. It is less well known for its stunning scent that is – as the name describes – incredibly sweet. Sweet could also describe the small blooms that grace our gardens twice a year in spring and again in autumn.
Jasmine
Those who favour more tropical scents over the delicate, creamy ones mentioned before will appreciate jasmine. This climber will cover fences, archways, and trellises to sport bright white flowers in late spring and into summer. The scent is so strong, due to the hundreds of flowers and vigorous growth of this plant, that it is bound to become your garden’s signature scent.
Magnolia
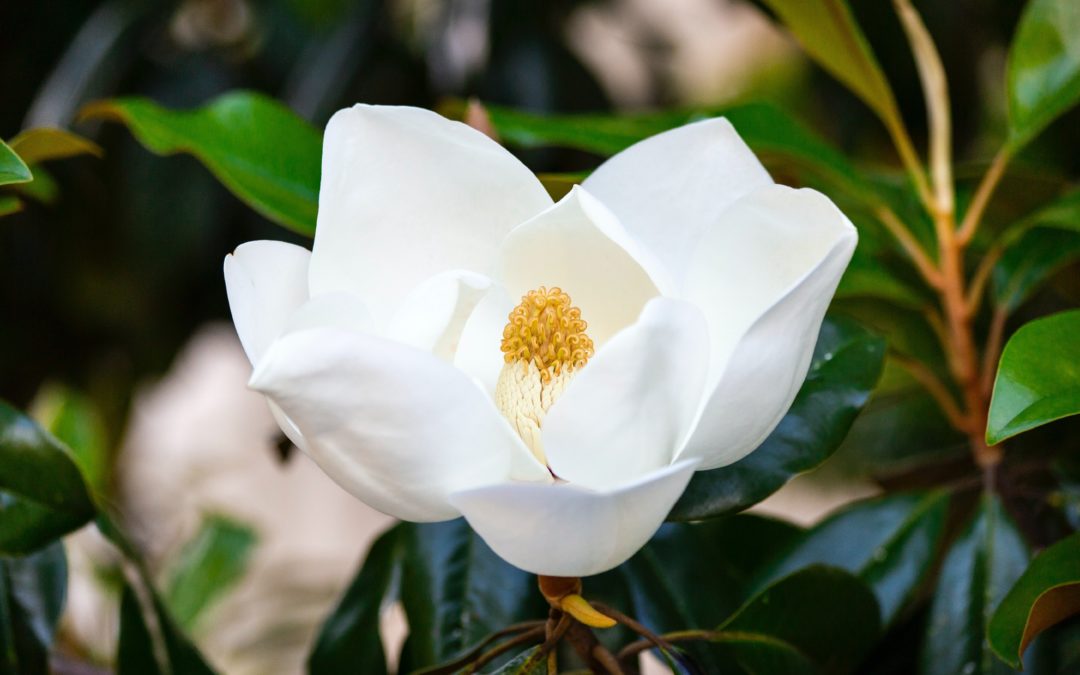
This list would be incomplete without at least one tree, and from the many to choose from, we have to opt for magnolias. Magnolias are truly magnificent, from the size of the flowers to the shade of the foliage. But where it really stands out is in scent. A mix of tropical, sweet and floral, towering magnolia trees make a sensory statement wherever they are planted.
Spring, the season of new growth, quickly becomes the season of more spending – especially for avid gardeners. Luckily, you don’t have to spend thousands for the perfect spring garden, especially if you’re a newbie gardener on a budget. There are many ways to start one that won’t break the bank. Try these tips for stunning spring blooms, without the extra cost.
Plan, Plan, Plan
Restraint is difficult for all gardeners at the best of times. But it’s essential, especially when you’re on a budget. A good plan – and a modest plan – will ensure you stick within your budget while achieving your dream garden goals.
A good garden plan helps you visualise what your garden will look like and betters your understanding of what your space has to offer, especially in terms of light, soil, and water. Knowing this stops you from excitedly splurging on tons of plants that won’t thrive in your garden anyway.
Once you’ve got your plan, it’s time to pick some plants. A useful mantra for newbies and novices alike is ‘start small’. Pick a handful of plants with similar needs that suit your garden and see how they do. Gardening doesn’t have to be about instant results; it’s more about the journey to achieving those results.
Plant Seeds
The best way to save money is by planting seeds. Even though it takes a little longer, requiring a little more patience and some extra skill, you’ll save plenty of money and have healthier, happier plants.
Planting from seeds gives you full control over growing conditions and the surrounding environment from the very beginning. This allows your plant to establish itself well in your garden from the get-go, saving you money and time on plant care.
Many will consider the waiting a negative trade-off. But watching your tiny seeds grow into fully-fledged flowering plants is so rewarding.
You don’t even have to spend a single cent if you’re considering planting seeds. Gather your own from the existing plants in your garden or get some from friends and neighbours. As your garden grows, it’ll be even easier to build your collection without spending any extra cash.
Propagate
Propagating is the most essential skill of budget gardening. Start with one plant, and end up with more than you could imagine. You simply need one cutting from a friend or kind neighbour to get started.
There are several ways to propagate different types of plants. Some plants grow shoots or plantlets that can easily be snipped off and re-potted. Others grow just as easily from leaf cuttings. Plants with nodes can be propagated by stem cutting, while those in clusters can easily be divided by separating the plant at root level.
Recycle & DIY
Ditch the expensive terracotta pots, and the cheap plastic ones, by making your own. Anything can be a container, from old boots to teapots and even old furniture. Drill some holes at the base and you’ll instantly have a quirky, unique plant container, for free.
Always ensure your chosen container is big enough for your plant. Before you start, clean whichever container you do use thoroughly with some soap and warm water to get rid of any harmful bacteria.
Another recycling favourite for gardeners is composting. Composting is a great gardening practice that everyone can (and should) do no matter where you live or how much space you have. It’s great for the environment and it saves you money on store-bought composts.
So many things can go in a compost heap, from garden waste to veggie and fruit scraps. Avoid tossing weeds and diseased plants in your heap, along with dairy and meat. It does take some time before its contents can be used as compost, but the wait is worth it, especially for gardeners on a budget.
Hydrangeas are like the spring’s pompom, cheering on the season. Blooming from spring to autumn, this flower is so beloved that it even has its own holiday! Hydrangea Day is celebrated on January 5th, which is perfect since it is a time of year when the beautiful Hydrangea ‘Endless Summer‘ is in full bloom!
If you are looking at growing your own hydrangeas at home, read the following tips and tricks on how to plant and care for them, particularly the Hydrangea ‘Endless Summer’:
Appearance
Hydrangea ‘Endless Summer’ is a deciduous shrub growing in a rounded shape. Its glossy, dark green leaves range from 10 – 20cm long, and its stunning blooms are showy mopheads nearly 20 – 25cm in diameter.
You can choose from a range of colours, depending on the alkalinity or acidity (pH) of your soil. Starke AyresAcid Loving Plant Food is a good fertiliser to help you regulate the pH levels. Shades range from deep blue to vivid lavender and from soft mauve to rose pink, depending on the .
Hydrangea ‘Endless Summer’ is compact, growing 1.5m tall and 80cm wide.
Planting
Autumn or early spring are the best times to plant Hydrangeas ‘Endless Summer’, since you want to give them time to establish a healthy root system before the blooming season begins.
Choose a sheltered planting site that receives partial shade – ideally, sun in the mornings and shade in the afternoon. Before planting, decide what colour Hydrangea ‘Endless Summer’ blossoms you want.
Dig a hole twice the width of your ‘Endless Summer’ root ball and roughly its depth. You want your plant to be just slightly higher than the level of the surrounding soil.
Begin to backfill the hole with soil. Stop halfway and pour water into the hole until it rises to the top. Once it drains away, finish filling in the rest of the soil.
If you’re planting your Hydrangea ‘Endless Summer’ plants as foundation plants, space them 2.5m apart from each other, measured from the centre of the plants. For a garden border, space them out 1m apart.
Growing conditions
‘Endless Summer’ actually enjoys partial shade to full sun and is able to bloom on both old and new growth from spring through summer or early summer to autumn, depending on the climate of your area.
Sun and shade:
‘Endless Summer’ thrives in partial shade, or roughly four hours of direct, unfiltered sunlight per day. It’s best if it receives sun in the morning and shade in the afternoon.
Soil:
‘Endless Summer’ can grow in a range of soils but needs moisture to flourish. The key thing to remember about soil is that the level of acidity or alkalinity will determine the colour – from blue to purple to pink. For a bluer shade, make sure your soil is acidic. For pinker, amend it to more alkaline, as needed. For bluer blossoms, you can adjust your soil with sulphur. If you’re more interested in bold pinks, adjust it with lime.
Watering:
You should water your ‘Endless Summer’ routinely each week, up to twice a week during the hotter months.
Fertilising:
Fertilise your ‘Endless Summer’ once in spring or summer with a specially formulated fertiliser, such as Starke Ayres’ Hydrangea Food or Acid Loving Plant Food.
Pruning:
You do not have to prune your ‘Endless Summer’, because they can bloom on both old and new growth. However, you should trim any dead, dying or diseased branches when you notice them.
Happy hydrangeas makes for a happy gardener
Be sure to follow these easy steps for happy Hydrangea ‘Endless Summer’ plants. They will keep blooming for you to enjoy! Buy your ‘Endless Summer’ hydrangeas in all the colours at Plantland.
While your garden is peaking and is filled with vibrantly coloured flowers during spring, it is precisely the right time to create a stunning bouquet from the fruits of your labour, so that you can enjoy the sights and smells of the garden inside your home. It only takes one gusty wind or heavy summer rain to destroy your beloved blooms anyway, and cutting guarantees that at least some of your flowers will be spared that cruel fate! Another reason to cut your flowers is that it encourages more flowering on your plants throughout the summer months and even into early autumn.
Read and follow the following tips and tricks on how to cut your garden flowers and use them inside your home:
When to cut
Early morning is the ideal time to cut fresh flowers, when the flowers have had the benefit of cool night air and morning dew. Their stems are filled with water and carbohydrates, meaning that they are firm to the touch. When harvesting, have a bucket of water on hand to immediately put the flowers into. We suggest using a plastic bucket rather than a metal one because metal can affect the pH balance of the water.
Different types of flowers must be harvested at different stages in their development. Cluster flowers with multiple buds on each stem, such as an Agapanthus, should have at least one bud showing colour and one bud starting to open before being cut. If gathered too early (while they’re still tightly budded) these flowers will not open in a vase of water. By contrast, flowers that grow on individual stems, such as roses, should be cut when fully open.
Cutting tools and techniques
Always use clean, sharp utensils when cutting flowers. Knives, clippers or shears can be employed, but never use ordinary household scissors! The gauge on scissors is set for paper or fabric, not for flower stems, which are bulkier. Using scissors will crush their vascular systems and prevent proper water uptake.
Cut all flowers about 3cm from the bottom of a main stem. Make the slice at an angle of about 45° as it will provide a larger exposed area for the uptake of water.
Water temperature
Use lukewarm water (between 37°C and 43°C) for your cut flowers to get the best results. Warm water molecules move faster than cold water molecules and so can be absorbed by flowers with greater ease. The objective is to get water and nutrients as quickly as possible to the head of the flower.
Preservatives
Using a preservative increases the longevity of cut flowers. To survive, flowers need three ingredients: carbohydrates, biocides and acidifiers. Carbohydrates are necessary for cell metabolism; biocides combat bacteria and are necessary for maintaining plant health, and acidifiers adjust the pH of water to facilitate and increase water uptake.
To make your own, use 1 teaspoon of sugar, 1 teaspoon of household bleach and 2 teaspoons of lemon or lime juice.
Care of cut flowers in an arrangement
Here are some general rules that will help you make your cut-flower arrangements last:
Don’t overcrowd the flowers in the container;
Check the water level in the vase and replenish it frequently;
Flowers that go limp are not drinking well and need to be recut;
Always discard wilted blooms;
Keep flowers away from drafts, direct sunlight and ripening fruits.
Get your lawn off to a great start this Spring – start with treating it right!
What you need to do:
1. Scarify the lawn.
Cut the lawn as low as possible with a lawnmower – this is called scarifying. There are scarifying machines available for hire but a lawnmower on the lowest cutting setting will do the job. Cut the lawn almost to the roots (except in subtropical areas and for grasses like Kukuyu as this may kill the lawn). If you don’t use a grass box on your lawnmower, the bits of grass left on the lawn will eventually compact and become thatch. Scarifying will help get rid of thatch build up.
2. Use a garden fork to poke holes into the lawn.
This aerates the soil, allowing air to penetrate the area – a fundamental growing need for plants.[ux_image id=”3288″]
[gap height=”20px”]
3. Fertilize the area.
Use a 2:3:4 fertilizer to give it a good kick-start and encourage strong roots. Using a fertilizer distributor will feed the area evenly.
4. Top dress the lawn using commercially formulated lawn dressing.
Using other soil like topsoil from the side of the road may bring all the weeds from the area onto your lawn so don’t do that! Spread a light load onto the lawn and then, using a plastic rake, spread the lawn dressing over the area. The lawn dressing should be a thin layer – avoid covering the plants completely.
5. Water it!
Water in the fertilizer and lawn dressing well and sit back and watch your lawn thrive.[ux_image id=”3289″]
Their bright blooms burst forth in September and instantly banish the last lingering traces of the winter blues. Here are some steps on how to grow them from seed:
For successful germination, use fresh seed. Pick the berries when they start colouring and remove the pulp and membranes around them. The seeds will be large with a pearly sheen.
Wash the seeds with an anti-fungal solution or a weak solution of dishwashing liquid and water.
[ux_image id=”3280″]
[gap height=”20px”]
Fill a seed tray with coarse, damp river sand (the soil should not be sopping wet). Push the seeds into the medium so that about 50% of their surface is above ground. Alternatively, you can use coconut husk or peat as the medium. You get these in handy blocks that you submerge in water – the product then absorbs water and makes a full 5l of awesome growing medium!
Cover with a layer of vermiculite – this forms a warm ‘blanket’ for the seeds to be able to germinate in. Place the tray in a warm spot out of direct sunlight. Although further watering is not needed, check that the sand remains damp.
[ux_image id=”3281″]
[gap height=”20px”]
Sprouting should be within 4 – 6 weeks.
Fill small pots or a deep seed tray with milled bark or commercial potting soil. Water the soil medium well and make holes of about 2cm deep with a dowel stick. Gently plant the sprouts in them, leaving half of the seed body above ground.
Place the seedlings in a warm, protected spot in the shade and water them with a gentle sprayer once or twice a week.
The seedlings are slow-growing, and can remain in their containers for about two years before they will be strong enough to plant out.
Our Team is ready to answer any questions or concerns that you may have. Feel free to get in touch!
Office Hours: 8:00am – 16:00pm
If we are not available then email us and we will get back to you as soon as possible. hello@tanyavisser.com